
Eight pages. One sheet. One cut. The mini zine is the rare craft project where the constraint does most of the design work for you, and where a finished, foldable, colorable booklet can exist ten minutes after the printer stops humming.
What follows: the format's scrappy history, the panel geometry that trips up first-timers, how to redraw line art so it survives at thumbnail scale, the fold-and-slit sequence itself, and a firm opinion about what to draw first.
In this Article
- One Sheet, One Cut: Where the Format Came From
- The Four-by-Two Grid and the Row That Has to Flip
- Drawing for a Page the Size of a Playing Card
- Creases, the Center Slit, and the Diamond Collapse
- Bold Shapes Win the First Edition
One Sheet, One Cut: Where the Format Came From
Science fiction fans were mailing each other amateur publications back in the 1930s, and the word "fanzine" landed in 1940. Four decades later, punk scenes picked up the same habit with cheaper tools: a photocopier, a stack of borrowed paper, and hands willing to fold and staple at a kitchen table. The historical archives of zines trace that lineage in far more detail than a craft tutorial can.
What carried forward into today's downloadable printables is the equipment logic. No stapler. No saddle-stitch binding. No print shop quote. A single-sheet mini zine needs one US Letter sheet at 8.5 by 11 inches, or one A4 sheet at 210 by 297 millimetres, plus scissors or a craft knife, a ruler, and a template already divided into eight panels.
Ordinary 20-pound copier paper (roughly 75–80 gsm) creases cleanly and collapses without fighting back. Heavier stock resists the final flatten; tissue-thin stock tears at the slit.
And those eight panels are your entire page budget. Front cover, back cover, six interiors. Nothing spills over onto page nine, because there is no page nine. Deciding what earns a panel before drawing a single line is the actual creative discipline of the format. Printing, creasing, cutting, and collapsing a prepared template takes 5–10 minutes; the artwork is a separate job entirely.
The Four-by-Two Grid and the Row That Has to Flip
Unfold a finished mini zine and the structure is obvious: four columns across, two rows down, eight rectangles. On US Letter, each panel measures 2.75 by 4.25 inches. On A4, each lands at roughly 74 by 105 millimetres before normal printer scaling and the small drift that folding introduces.
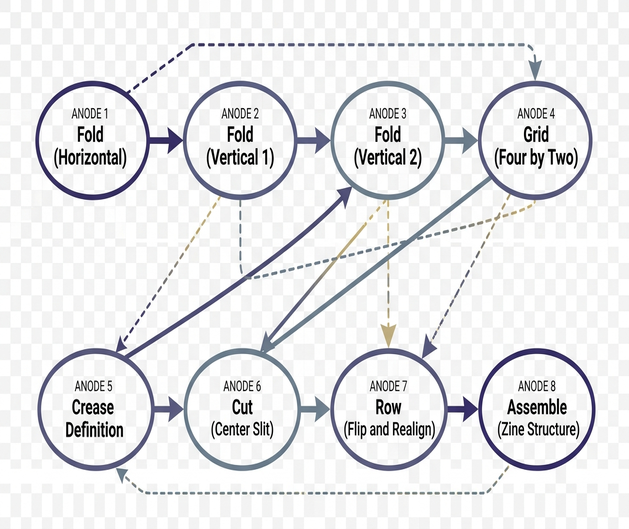
Fold a Dummy Before You Fold a File
Skip the screen for three minutes. Take a scrap sheet, fold it the same way the finished zine folds, then write "1" on the front cover and number every page through to the back. Unfold it. That scribbled grid is now the most reliable page map available, and copying it into the digital canvas beats reasoning about page order from a thumbnail preview. A numbered dummy takes 3–6 minutes to fold, label, unfold, and compare against the file.
The dummy also exposes the format's signature failure point: one row of the grid sits upside down relative to the other. Rotate that row 180 degrees in the template and every page reads upright after the collapse. Leave it unrotated and four of the eight pages arrive on their heads, cheerfully and irreversibly, after the ink is dry.
Margin Discipline Keep faces, hand-lettering, page numbers, and any other critical mark at least 0.125–0.25 inch (roughly 3–6 millimetres) inside each panel edge. Borderless output is the exception, not the assumption, and only after a specific printer has been tested for it.
Drawing for a Page the Size of a Playing Card
A drawing that looks confident at 300 percent zoom on a Wacom tablet can arrive at final size looking like a smudge of hair. The fix is unglamorous and non-negotiable: judge the art at panel size, on paper, with the coloring tool someone will actually use.
Start test contours somewhere near 0.75–1.25 points at final print size, then print a proof and look at it under normal light. Printer resolution, paper absorbency, and drawing style all push that number around. Thin strokes vanish into the paper texture; heavy strokes swallow the gaps between them.
Negative space matters more than line quality in a coloring zine, because negative space is the product. Make the principal coloring areas at least about 0.2–0.3 inch (5–8 millimetres) across wherever the composition allows. Anything narrower stops accepting a colored pencil tip, and a broad marker nib turns three tight shapes into one gray-brown blob.
Two habits reliably wreck small panels:
- Dense background texture. Crosshatching, stippling, and repeated micro-patterns compress into visual mud at 2.75 inches wide.
- Fine detail sitting on a fold. Creases shift a millimetre or two during collapse. Tiny repeated marks straddling that line will look misprinted even when the print was perfect.
Budget 10–20 minutes for one full cycle: print, fold, color a test area, revise the line art. Two cycles is common. Marker editions deserve their own check, since water-based and alcohol markers feather and bleed through lightweight copier paper; a heavier stock that still creases cleanly usually solves it.
Creases, the Center Slit, and the Diamond Collapse
The physical build is short enough to memorize. Four to eight minutes per sheet, start to finish.
- Hamburger fold. Fold the sheet in half widthwise and press the crease firmly with a thumbnail or bone folder.
- Quarter folds. Fold in half again the same direction, creating the two quarter creases. Open the sheet flat.
- Hot dog fold. Fold in half lengthwise. Crease, then open completely. The sheet now shows a four-by-two grid of eight panels.
- The center slit. Cut along the lengthwise center line, but only across the middle two panels. On US Letter that cut measures 5.5 inches; on A4, just under 150 millimetres. With a craft knife, work on a cutting mat and make one ruler-guided pass. With scissors, refold so the center segment is reachable through the folded edge and cut to the quarter-crease stop.
- Collapse. Refold lengthwise, then push both short ends toward each other. The slit opens into a diamond. Guide the four emerging wings into a cross shape, then fold them flat around the spine.
- Check and burnish. Flip through, confirm the page order matches the dummy, and run a firm crease down the spine.
Where the Slit Must Stop The cut spans exactly the middle two panel widths and nothing more. Run it out to an outer edge and the sheet stops being a self-supporting booklet: it becomes loose leaves with a dramatic tear down the middle.
Bold Shapes Win the First Edition
Make the first mini zine out of big, loud, abstract shapes. Silhouettes, broad stripes, spirals, leaves, rounded blobs, simple geometric repeats. One dominant motif per interior panel, six interiors, two covers, and no continuous artwork that has to line up across a fold.
The reasoning is mechanical rather than aesthetic. Printer alignment drifts. Hand folds shift. A crease landing a millimetre off center cuts through a character's eye or clips a hand-lettered title, and the whole spread reads as an error. Bold abstraction absorbs that drift invisibly, which means the first proof tests the fold instead of testing your patience.
There is a scheduling argument too. A simple set of eight panel designs takes 20–40 minutes, followed by one 10–20-minute print-and-revision pass. An intricate narrative sequence takes hours, and discovering a rotation error after those hours is a genuinely deflating way to spend an afternoon.
So the recommendation stands: fold three abstract editions before drawing a single storyline. Learn how your specific paper collapses, how your printer handles margins, and how your markers behave on it. Once the mechanics are automatic, the detailed narrative zine you actually want to make will come out right on the first print run instead of the fifth.









Join the Conversation
Nothing here yet. Add your opinion.
Add Your Thoughts