
From Cut-and-Tape Repeats to Digital Motifs
Picture a sheet of painted leaves and berries destined for a repeating fabric print. A painter once had to cut and tape artwork or copies together, then paint over the joins. The digital route lets the original sheet stay intact: scan it, separate the motifs, correct their color, and arrange them inside a repeat block.
That block is the rectangle the printer tiles horizontally and vertically. Its edges matter as much as its center. A leaf cut by the left edge has to reappear at the same height on the right; even a one-pixel mismatch can show where those tiles meet.
The satisfying part is getting to move a berry without repainting it. The careful part comes first: capture the pale washes, remove the paper around them, and bring the scanned color close to the painting before arranging anything.
Give the Leaf-and-Berry Sheet a Clean Scan
Start at the scanner glass. Dust that looks harmless on a desk can turn into a speck that repeats across the finished pattern. Wipe the glass, check the painting for loose debris, and run a preview scan so you can set the crop without trimming a leaf tip.
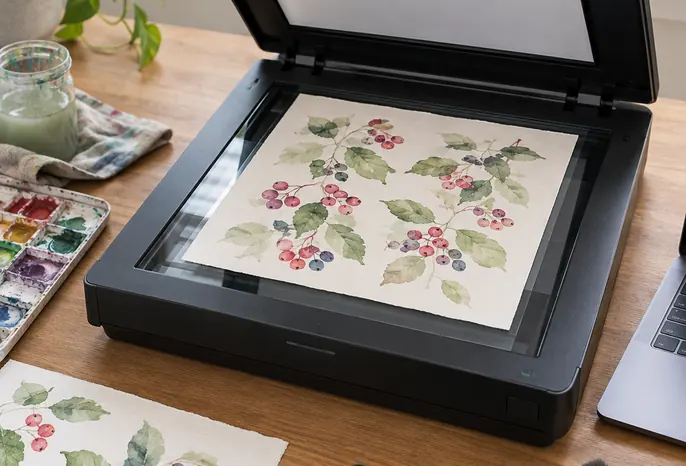
Scan the sheet in color at at least 600 ppi optical resolution, then save a lossless master such as a TIFF. Keep that file unchanged. Work from a duplicate when it is time to separate motifs or adjust color; increasing the resolution of an undersized scan later will not bring back missing brush detail.
Give the palest berry wash a close look in the final scan. If it has disappeared into white, the selection work ahead gets much harder. A careful preview and final scan of one letter-size sheet may take roughly 5–15 minutes, depending on the scanner and the size of the artwork. That is time well spent before the fiddly screen work begins.
Lift the Paint Without Taking Its Pale Edges
Cold-pressed paper gives watercolor its lovely bumpy surface. On a digital repeat, leftover paper can become a distracting pattern of its own. The trouble spot is the edge where watery pigment fades into the sheet: a hard cut makes the painting look like a sticker, while a loose cut carries paper texture along for the ride.
The cold-pressed paper still visible through a berry’s pale outer wash becomes a fleck repeated in every tile unless the mask preserves the wash while hiding the surrounding paper.
- Inspect each motif at full size, especially faint leaf tips and berry edges.
- Make a selection around the painted shape and turn that selection into a layer mask.
- Place a temporary light background behind the motif, then switch to a dark one to reveal pale halos and stray paper specks.
- Paint on the mask to hide or restore areas while leaving the painted pixels on their original layer.
I keep the mask editable until the repeat is finished; an edge that looks tidy on its own can reveal a halo against another motif. For a sheet with four to six separate shapes, allow an initial 20–45 minutes for masking, then revisit the faint washes at full size before building the tile.
Bring the Scanned Color Back to the Painting
Set the physical painting beside a reasonably calibrated display. Start with its lightest wash: can you still see the diluted color inside the leaf? Then compare the darkest pigment. Those two points give levels or curves adjustments a useful target.
Make tonal changes on a duplicate or adjustment layer. Restore the darks carefully, check that the highlights have not turned blank, and adjust saturation only after the light-to-dark range looks close. Pushing saturation first can make a washed-out scan look lively while leaving its delicate gradients flat.
Keep the working color profile embedded in the file, and ask the fabric or stationery printer which output profile or proofing guidance to use. A screen match helps you make informed edits; ink, substrate, and the printer’s color workflow still affect the finished color. Keep the original painting nearby for the physical proof later.
Make the Leaves Travel Across the Tile
Place the largest leaves first. Their angles set the movement through the block, so give them room before adding berries to balance dense spots. Once the main shapes sit well together, turn on an offset view or pattern preview. Adobe's official pattern creation guidelines cover the pattern tools if you need the software steps.
Now follow every cut edge to its matching side. In a 12-inch-wide tile at 300 ppi, a leaf crossing the left edge must continue 3,600 pixels to the right at exactly the same vertical position. Apply the same matching rule from top to bottom. Check both joins before filling gaps; an attractive single tile can still form a visible grid when repeated.
View at least three tiles across and three down. Look for a row of berries that draws an accidental stripe or an empty channel between the leaves. Small secondary marks can soften those spaces, but add them after you have seen the full repeated view. Each mark should help the design flow, rather than disguise a broken seam.
Print the Repeat Before It Goes to Production
A screen can hide a fine white sliver or make a repeated dark edge look less obvious than it will on paper. Export a page filled with the repeating design and print it on your home printer. Stand back to spot an obvious grid, then move close enough to inspect the horizontal and vertical joins for clipped washes, gaps, and hairline seams.
Print one full page with the pattern block reduced to 25% to judge its overall rhythm. Check a proof at the intended production scale too, since reduction can conceal a tiny mismatch. Under consistent lighting, compare the printed colors with the original painting. If a seam or gap appears, fix the block and print again before sending the file to a fabric or stationery printer.
Next step: Scale your finished repeat block to 25%, print a full page of tiles on your home printer, and inspect it from arm’s length for a visible grid.









Join the Conversation
Nothing here yet. Add your opinion.
Add Your Thoughts